You probably already referenced maps with written coordinates but using photos or images is a little different as you need some characteristic points so you can control the position of the image according to the real world. In this little tutorial I’ll show you how to do a so-called image to image refernciation using Open Streetmap data and QGIS 2.0.1 Dufour.
Data
What we will use is an image from the BVG the public transport agency of Berlin which shows the lines of city- and underground trains in Berlin and surrounding areas:
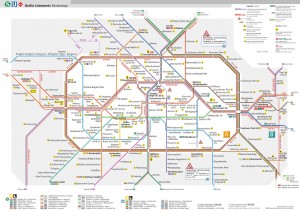
As you can see it’s a generalized map and we will certainly distort the image by draping it over real world data. You can download a high-res version here (attention 69 mb!).
the georeferenciation
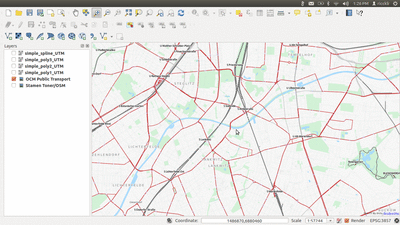
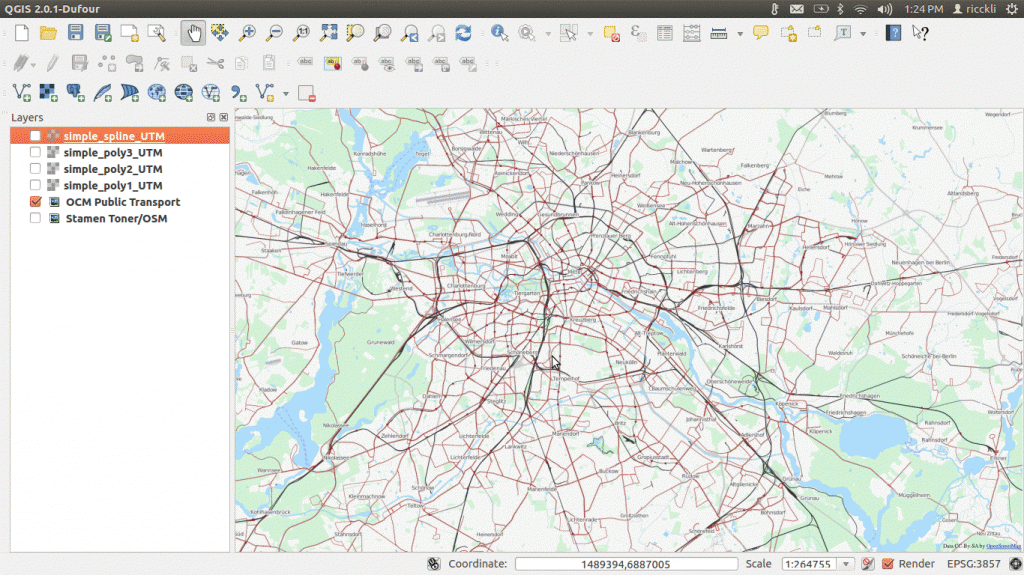
Open up QGIS and start the openlayers plugin. Make sure that the project has UTM coordinate system of your location (EPSG: 32633 in my project WGS84 UTM Zone 33N) as coordinate reference system (CRS). The OpenStreetMap (OSM) base layer is referenced to EPSG 3857 but is rendered to fit the 32633. The difference: using 4326 as the CRS you will get coordinates like 13,15265° and not 2345624.13214 which is a relational coordinate comparable in UTM system but is has meters as unit which is very nice to handle. For some performance issues I am using the OpenCycle version of OSM as it renders a little faster.
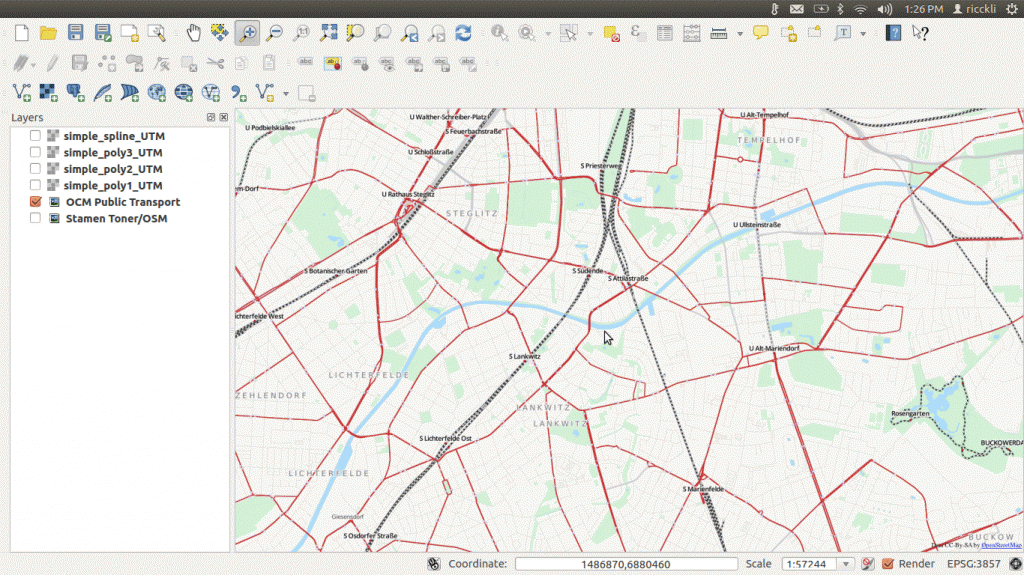
Next open up the Georeference using Raster->Georeferncer and use CTRL+O to open a new unreferenced raster in the Georeferencer. Now we need to find some well distributed points or “crossings” in our map and find the corresponding position in the OpenCycleMap. If you have a point, use the CTRL+A to add a control point. In the dialogue for this point use From map canvas to get the coordinate for this point:
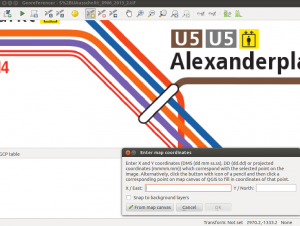
Now search for this selected place on the OpenCycleMap and select this point. If you need to pan or zoom on the OpenCycleMap you will loose this selector option. Just switch tabs again and press once more on From map canvas.
If you have selected the correct point in te map you will get an entry in the list of ground control points which translates original XY coordinates (more or less pixel numbers) to real-world coordinates:

It is always said use as lots of points as possible. Of course: linear transformation only needs 2 points, polynomial transformation with 1 degree needs 3 points and so on.
I will now go on after I’ve set 13 GCPs in my project. Let’s choose the transformation now:
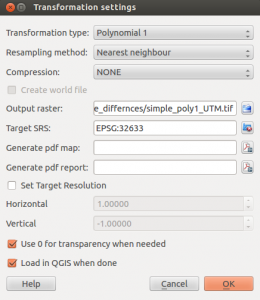
As you can see I am sticking with nearest neighbour interpolation. You can definitely choose cubic or something so the picture would not look so blocky. The main difference in tranformation type is shown in this ESRI image:

After setting the transformation properties, resampling method, output name and target SRS (coordinate system) you can press okay. All settings are made and by pressing CTRL+G (the “play” button) the image is referenced and stored in the desired location.
results
Lets face the different results. I’ll leave the interpretation to you. We will start with an overview animated GIF:
You can see the different degrees of distortion. Polynomial transformation with a third degree polynom has also some strange behaviour at the borders.
Now let’s have a look at the details in the lower section of the image:
Now: happy georeferencing!!!

[…] You probably already referenced maps with written coordinates but using photos or images is a little different as you need some characteristic points so you can control the position of the image according to the real world. In this little tutorial I’ll show you how to do a so-called image to image refernciation using Open Streetmap data and QGIS 2.0.1 Dufour. […]